
Tires are the element riders most often change on a bicycle, hands-down. Whereas some individuals trip till they don’t have a single etching of tread left, people swap out their bike’s tires from trip to trip relying on situations.
Regardless that altering a tire — both due to a brand new buy or a flat — is the commonest mechanical adjustment riders make, it nonetheless can current a irritating set of challenges, even in the perfect circumstances.
BikeTiresDirect (aka BTD) is aware of tires in and out, and so they have labored tirelessly to create an exhaustive listing of suggestions and tips to clean out any points one would possibly come throughout throughout a tire swap. We picked out a few of the most vital ones for tube-type and tubeless tires to make sure slapping on new rubber begins and ends with as a lot stoke as the primary trip with them – quite than with sweat, sore arms, and cursing.
Tubes
Defend the tube: Even a slight puncture the dimensions of a needle prick can destroy the integrity of the tube and result in sluggish leaks that may have riders seemingly spending as a lot time pumping as driving. Earlier than mounting a brand new tire with a tube, BTD recommends double-checking rim tape, spoke holes, and each floor that touches the tire for any sharp or pointy bits that would slice right into a tube. That is significantly vital whereas changing a tube after a flat, since pesky bits of particles that triggered the preliminary flat may linger.
Bike mechanics typically make some extent about having the valve stem lined up with the tire label – that is for extra than simply aesthetics with regards to tubes. After a flat, inflate the tube after eradicating it from the tire to seek out the outlet within the tube. As soon as the outlet is situated, reference the place the location of the puncture or pinch flat is on the tire by evaluating the place of the outlet within the tube to the tire, utilizing the tire valve and tire label as reference factors.
This normally makes discovering the reason for the flat a lot simpler since you realize the place to look. Simply because you’ll be able to’t really feel something contained in the tire on the level of a puncture additionally doesn’t imply there isn’t something within the tire – items of glass could possibly be embedded within the tire that you would be able to’t really feel contained in the tire cavity, which may puncture the brand new tube as soon as inflated. Be sure to take away any international objects fully earlier than reinstalling the tube.

Maintain it unfastened: Some tires match extra snugly than others. It’s not unusual to seek out your self struggling to get each beads of a tire onto a rim mattress as a result of they’re so tight. To maintain the tightest a part of the tire unfastened across the wheel, riders can create more room by dropping one of many tire’s beads into the deepest a part of the rim mattress. From there, it’s simpler to roll the opposite facet of the tire into place.
The exhausting half: The final couple of inches of a tire could be essentially the most irritating to get into place, even with the other bead positioned in a useful place. As soon as the tire begins to get tight when putting in the second facet of the bead, bear in mind to pinch the 2 beads collectively all the best way across the tire to get each beads to drop into the middle channel to offer you extra wiggle room up high.
Whereas many riders don’t thoughts battling their arms to muscle the final little bit of the tire into place, high quality tires levers or tire bead jacks could make the method extra easy. That is vital since utilizing the incorrect software, and even the fitting software incorrectly, may end up in harm to the tube, rim tape, and even rim.
Quarter stress pitstop: Now that it’s time to inflate the tire, take further time to make sure that all the pieces will get into the fitting place because the tube inflates. BTD recommends stopping at a few quarter of the max tire stress to examine the tire for any indicators that the set up went awry. This fast step may save individuals from a deafening and horrifying pop if one thing does go incorrect.
Tubeless
Take time with tape: A very good tape job is the muse for any tubeless setup. With out it, tires is not going to maintain air or sealant the best way they need to. If putting in new tape, BTD says riders ought to use tape that’s a few millimeters wider than the rim’s inner width to fully cowl the central channel and underneath the tire beads. Start taping just a few inches previous the valve gap, and be meticulous. Pull tight, clean out any bubbles as you go, and proceed for an extra two or three spokes previous the valve holes. Additionally, be sure the rim is clear and freed from any residue earlier than making use of tape.

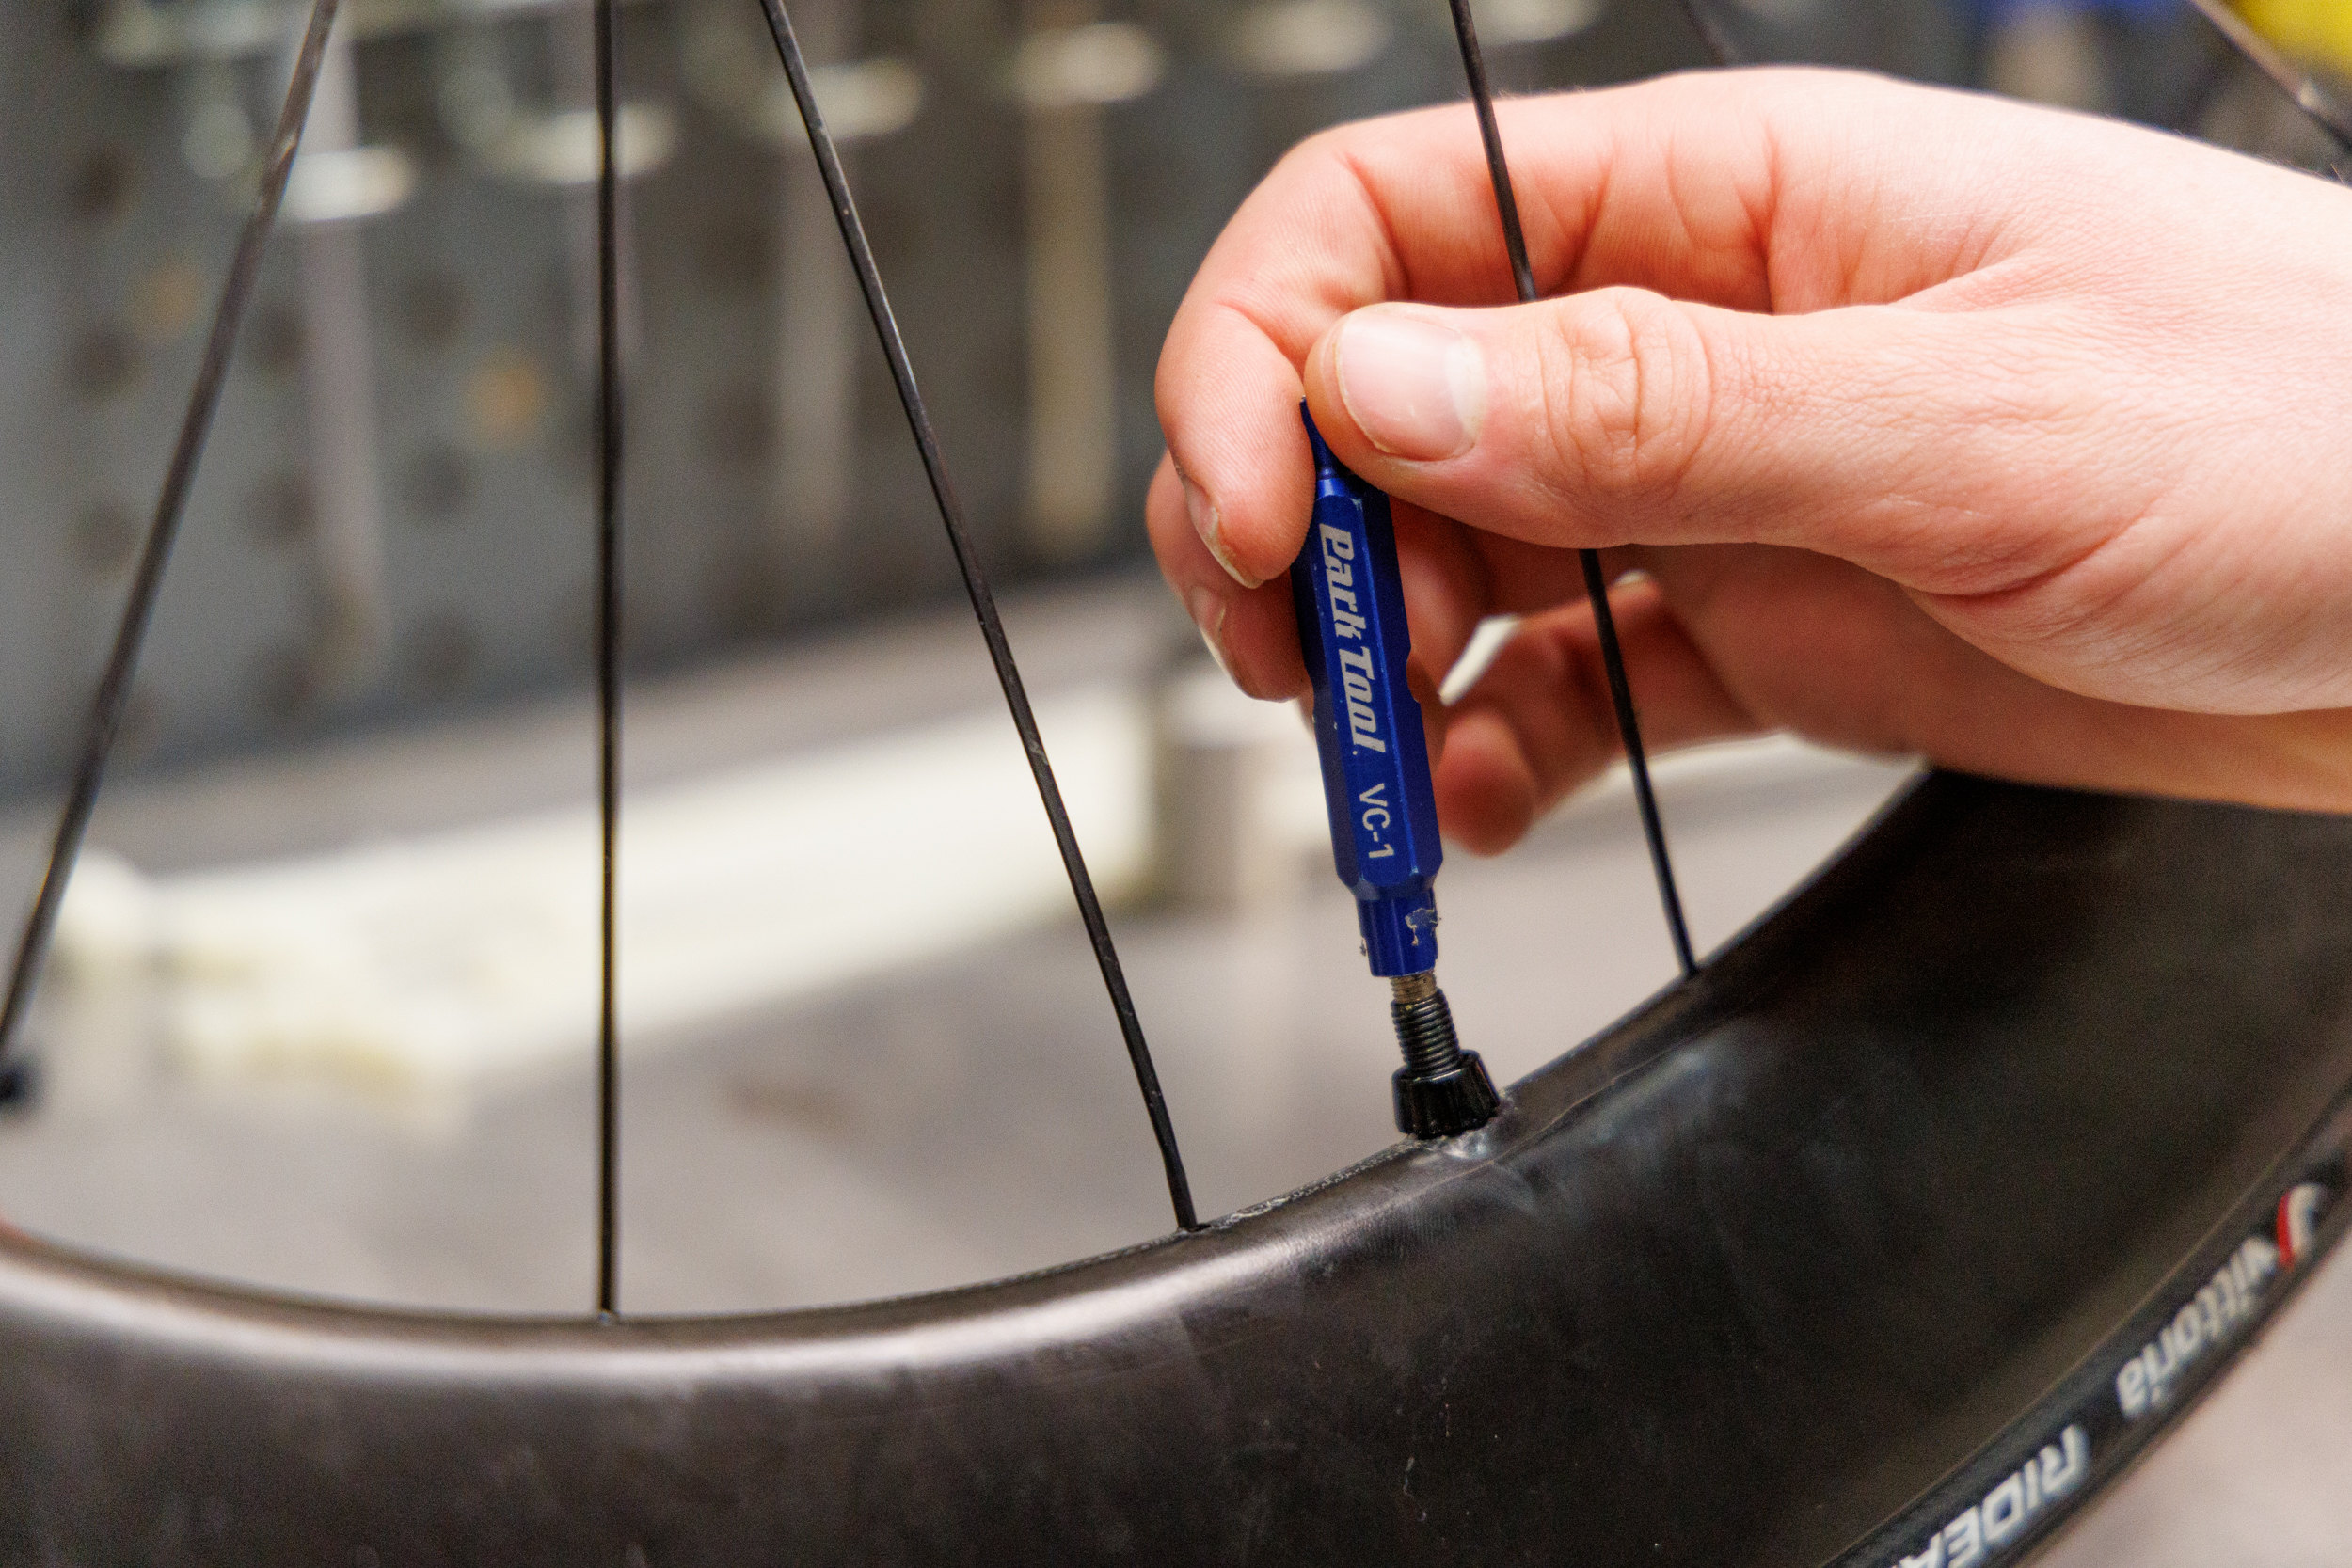
No screws unfastened: As soon as the rim tape is on, it’s time to mount the valve stem. Begin by reducing a small gap within the valve gap (an axe works effectively to puncture a gap, quite than utilizing a blade to chop tape away), then push the stem by it. Use the locking nut to firmly lock the valve stem into place. Simply because the valve of tubes is a primary spot for studios if the rim tape is unhealthy, the stem of tubeless wheels is prime actual property for leaks. Guaranteeing a good seal right here will preserve the air you’re about to blast into the tire the place it must be.
Mount up: That is the place tubeless tire setups get difficult. Seating tire beads onto a rim requires loads of air quantity and precision, so any errors can result in failure. Making an attempt to get it achieved with a flooring pump can simply change into one of many least enjoyable stuff you do in your bike. When you have no different choice, use a tube workaround talked about beneath.
When you have a detachable valve core, take it out to get the utmost airflow into the tire. As soon as the bead is correctly seated, you’ll be able to put it again in and reinflate it later after including sealant. Air compressors make tubeless tire set up a breeze. They assist you to immediately hit the amount stress wanted to seat a bead with out relentless pumping. Hear for a collection of pongs and pings to know when the bead is correctly seated. Word that if utilizing an air compressor, watch out to not add air too rapidly – an excessive amount of, too quick may cause the tire to blow off the rim and even harm some carbon rims.
If the tire is holding air, however you’re struggling to get the bead to pop into place with no ton of air stress, you’ll be able to add some watered-down dish cleaning soap to the bead to behave as a lubricant to assist it slide into place.
The tube workaround: When you have tried all the pieces and simply can’t get the bead to seat, you’ll be able to at all times use the tube trick. Simply throw a tube into the tubeless tire with out sealant and inflate it the best way you’ll with a traditional tubed setup. This may information the tire into the right place and seat the beads. After that, deflate the tire and solely take away one facet of the bead to take out the tube – now you’ll be able to add sealant and solely fear about seating one facet of the tire bead as a substitute of each
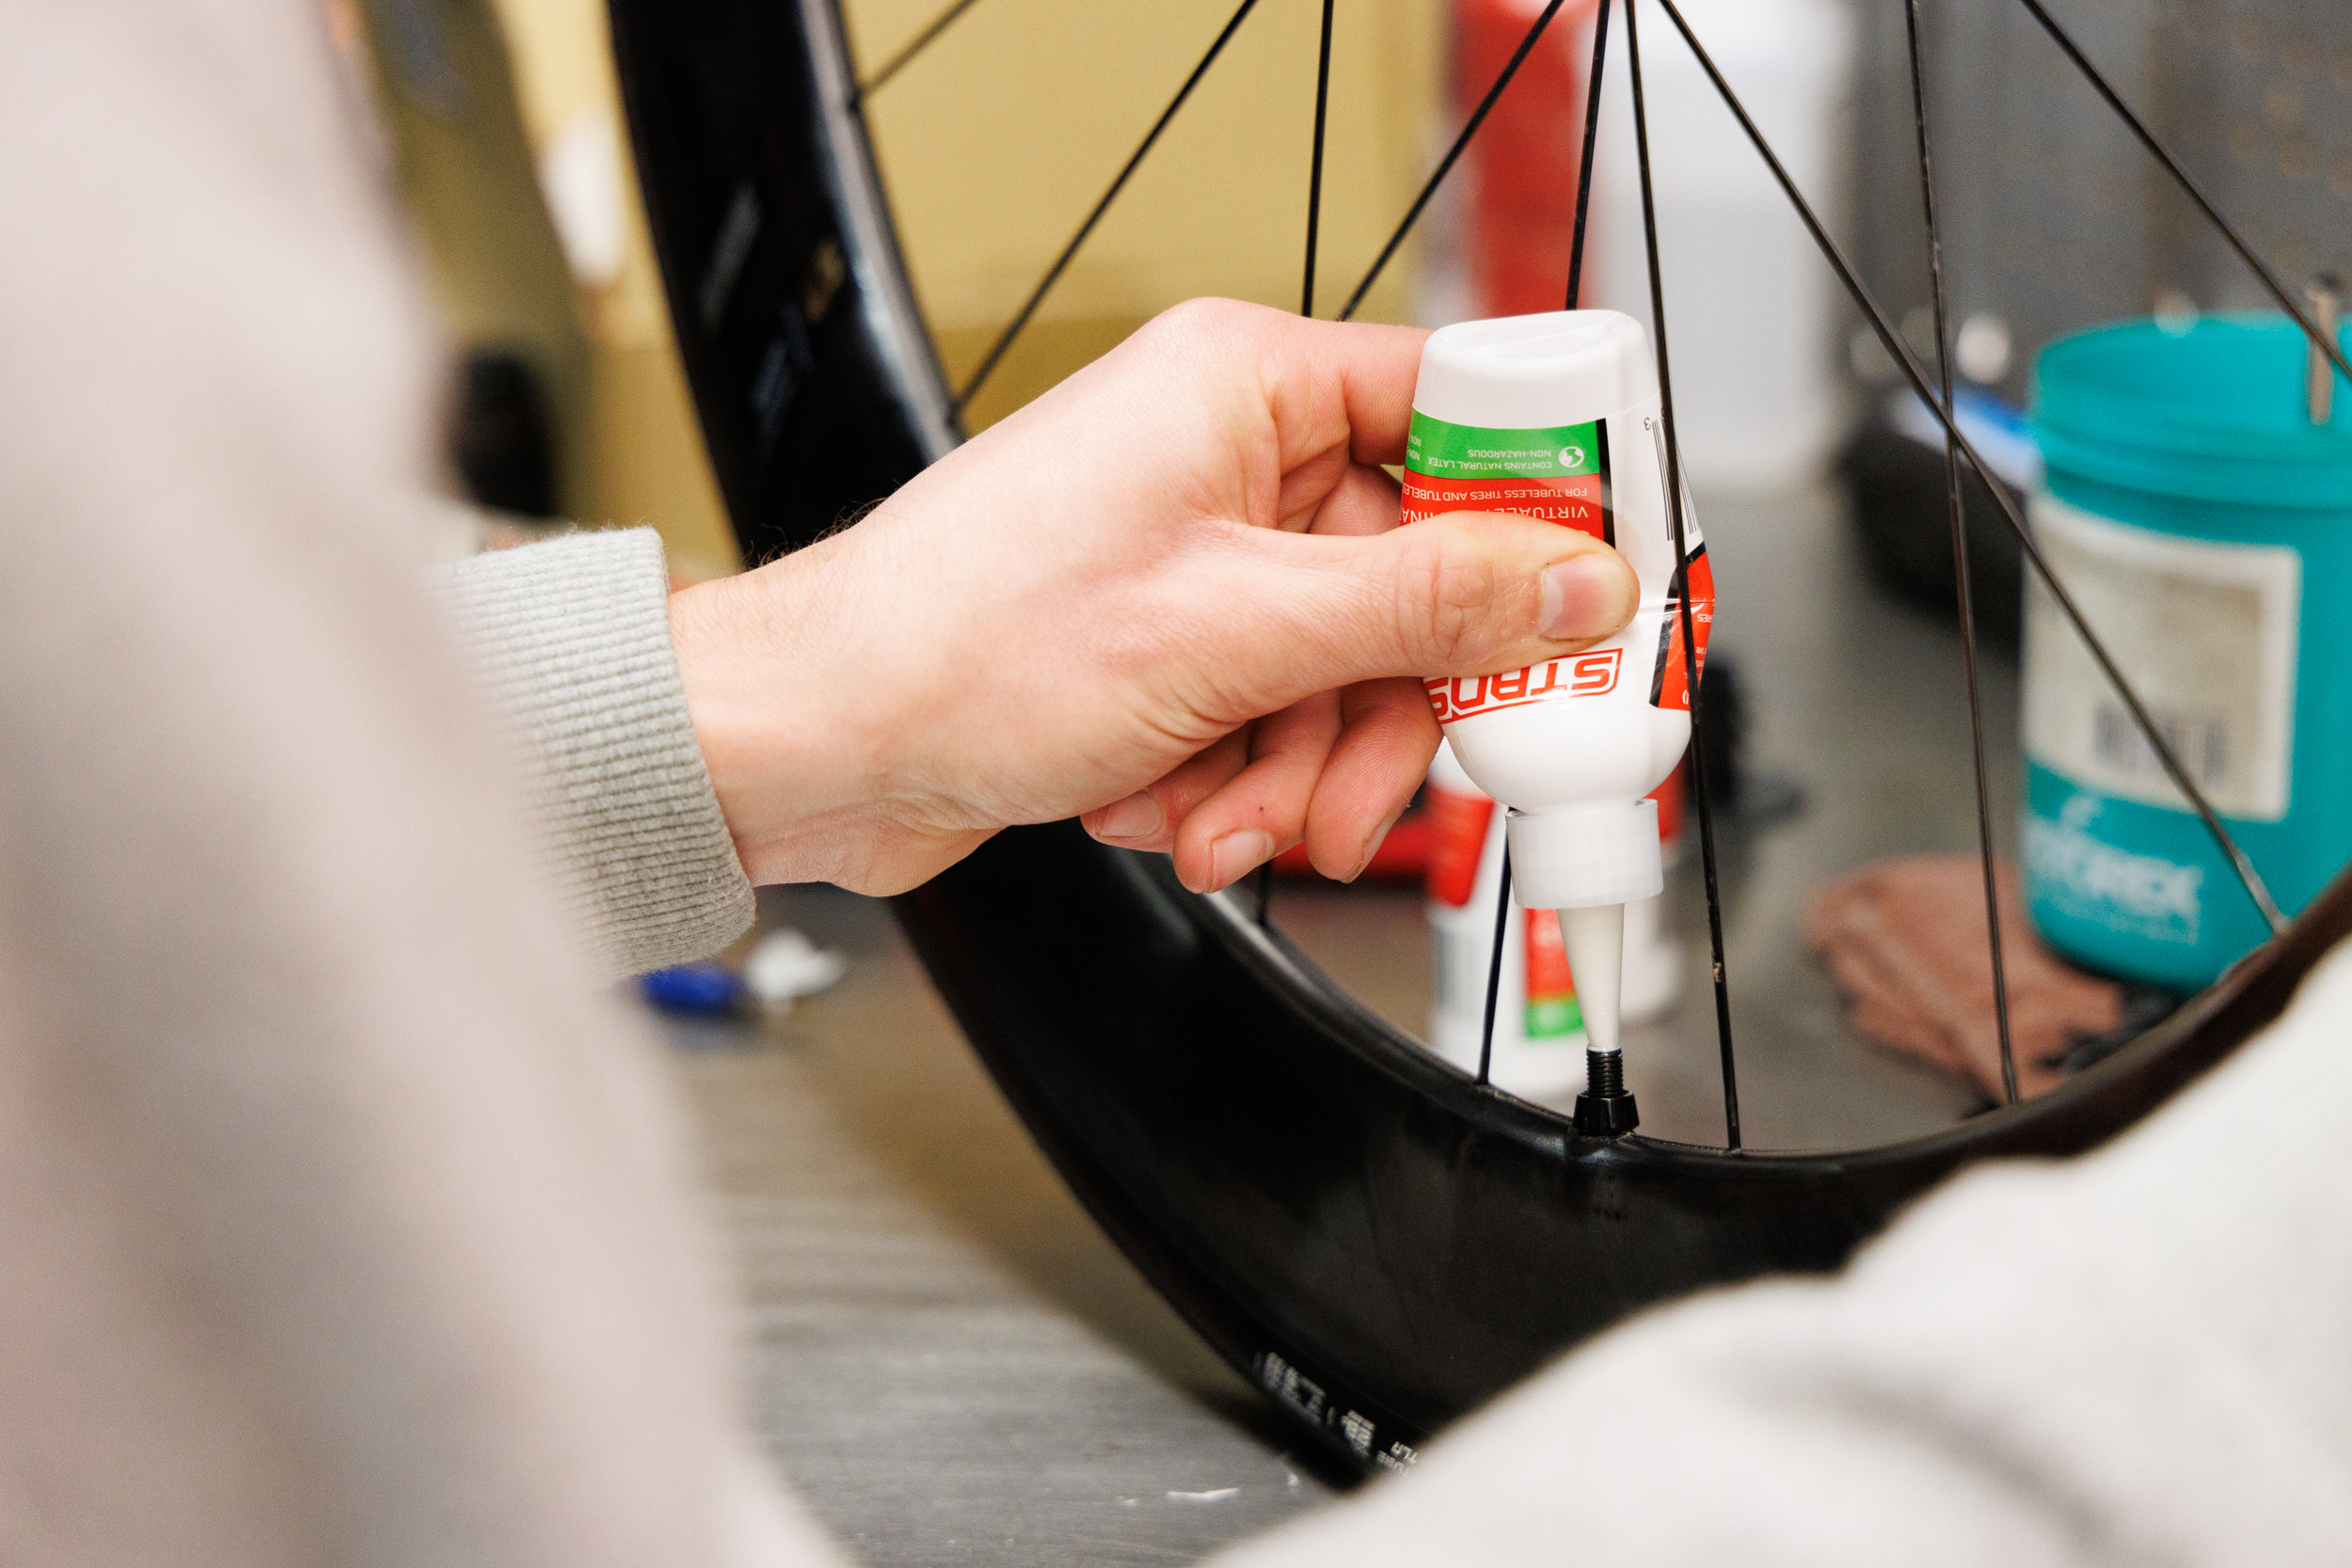
Sealant — shaken, not stirred: Riders want to begin rolling and shaking the tire as quickly as they inflate it to make sure sealant disperses fully all through the tire. It’s not unusual to listen to somewhat air escaping right here or there because the sealant finds seal imperfections to plug. It may be useful to carry the wheel flat like a pizza to permit the sealant to pool across the bead space. Slowly transfer the wheel so the sealant strikes all the best way across the inside the tire, after which flip the wheel and repeat for the opposite facet. Hear for any leaks, after which take into consideration orient the wheel in order that sealant will pool over the sound of the leak – it’s oddly satisfying to listen to the hiss cease because the sealant finds the outlet.
After a couple of minutes of that, get the wheel again on the bike and go for a fast spin. This may assist the sealant proceed to plug any spots for a good and lasting seal.
These are just some suggestions BTD presents to assist navigate the ins and outs of tire setup and upkeep. The model additionally gives much more data on issues like correct sealant quantities, security suggestions for brand spanking new tires, and some fascinating hacks to make putting in new tires even simpler.
For the total listing of suggestions, head over to BTD’s web site, and be sure you observe on Instagram and YouTube for extra bike-centric content material.
This submit is sponsored by BikeTiresDirect.com.